Downloaded a WebP image on Windows and need a PNG? You are not alone. WebP is now the default format for most web images, but many Windows apps still expect JPG or PNG — including older versions of Microsoft Office, print services, and some design tools.
Here are four ways to convert WebP to PNG on Windows, from no-install browser tools to built-in Windows utilities.
Method 1: Use pixconv.io (Fastest — No Install Needed)
The easiest way on any version of Windows is to use a browser-based converter. pixconv.io/webp-to-png converts WebP to PNG directly in your browser — no file upload, no signup, no software installation.
Steps:
- Open Chrome, Edge, or Firefox on Windows.
- Go to pixconv.io/webp-to-png.
- Drag your WebP file from File Explorer into the drop zone on the page.
- Conversion happens in under a second.
- Click Download to save the PNG to your Downloads folder.
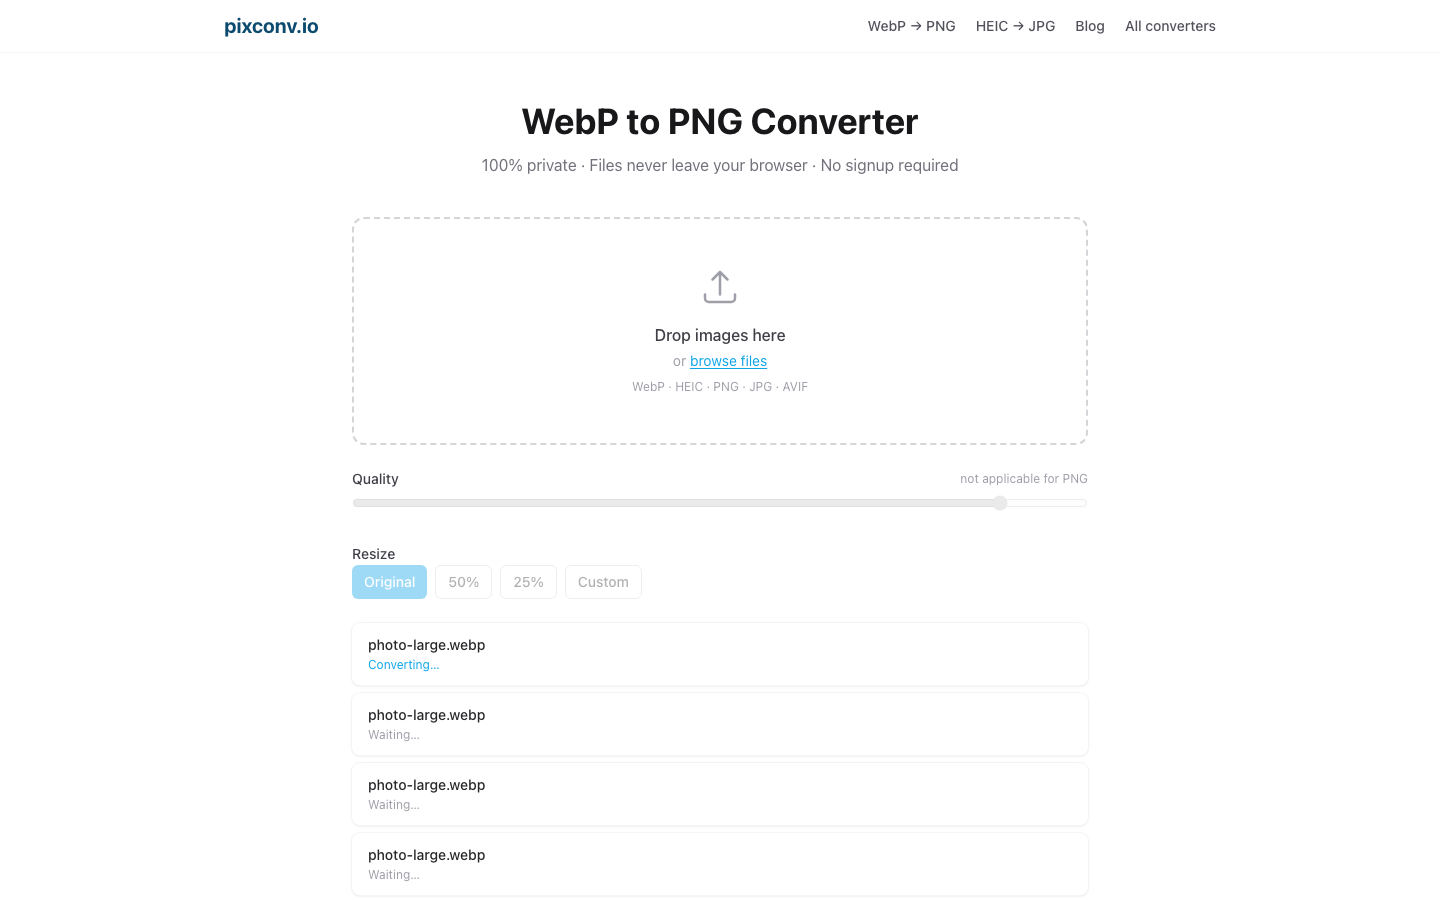
Batch conversion: Drop multiple files at once. When they are all converted, a Download all as ZIP button appears so you can grab everything at once.
This works on Windows 10 and Windows 11. No administrator privileges required.
Method 2: Microsoft Paint
Windows Paint has supported opening WebP files since the Windows 10 November 2021 Update (21H2). If your Windows is up to date, this is the easiest offline method.
Steps:
- Open Paint (search for it in the Start menu).
- Go to File → Open and select your WebP file.
- Once the image loads, go to File → Save As.
- Choose PNG Picture from the submenu.
- Enter a filename and click Save.
Check your Windows version:
- Windows 10 21H2 or later: Paint supports WebP ✅
- Windows 10 20H2 or earlier: Paint cannot open WebP ❌ — use Method 1
- Windows 11 (any version): Paint supports WebP ✅
Limitation: Paint is a one-file-at-a-time tool. For multiple files, use the batch feature in pixconv.io (Method 1) or Photos (Method 3).
Method 3: Windows Photos App
The Windows Photos app can open WebP files and export them as PNG on Windows 10 and Windows 11.
Steps:
- Open the WebP file in Photos (double-click, or right-click → Open With → Photos).
- Click the three-dot menu (⋯) in the top-right corner.
- Select Save as (Windows 11) or Save a copy (Windows 10).
- In the Save dialog, set the file type to PNG and choose a save location.
- Click Save.
Note: Depending on your Windows version and Photos app update, the exact menu options may differ slightly. If you do not see a format option in the Save dialog, try changing the filename extension from .webp to .png before saving — Photos will re-encode in the selected format.
Method 4: Paint 3D (Windows 10)
Paint 3D, included in Windows 10, handles WebP conversion more reliably on older Windows 10 builds than standard Paint.
Steps:
- Open Paint 3D from the Start menu.
- Click the Menu icon (≡) in the top-left corner.
- Select Open → Browse files and open your WebP file.
- Click Menu → Save As → Image.
- Change the file type to PNG and save.
Paint 3D was removed from Windows 11 24H2, so this method is for Windows 10 only.
Which Method to Use on Windows?
| Situation | Recommended method |
|---|---|
| Any version of Windows, quick conversion | pixconv.io |
| Windows 10 21H2+ or Windows 11, offline | Paint |
| Single file with a full preview | Photos |
| Batch of many files | pixconv.io batch |
| Windows 10 older build, offline | Paint 3D |
Why Windows Sometimes Cannot Open WebP
WebP support was added to Windows gradually:
- Chrome and Edge: Full WebP support since 2014 (Chrome) and 2020 (Edge).
- Windows Photo Viewer (the classic viewer): No WebP support on any version.
- Windows Explorer thumbnails: WebP thumbnails began appearing in Windows 11 and later Windows 10 updates. On older builds, WebP files show a generic icon.
- Microsoft Office: Word, PowerPoint, and Excel 365 can embed WebP since 2021. Older versions cannot.
If WebP thumbnails are not showing in File Explorer, right-click → Properties → Details to check the file type. You can also drag the file into a browser tab to confirm it is a valid WebP.
Fixing “Windows Cannot Open This File” for WebP
If Windows shows an error when you try to open a WebP file, it usually means no installed app is associated with the .webp extension.
Quickfix:
- Right-click the WebP file in File Explorer.
- Select Open With → Choose another app.
- Select Microsoft Edge or Photos.
- Check Always use this app to set the default for future files.
Alternatively, drag the file into an open browser tab. It will display the image, and you can proceed with browser-based conversion from there.
Converting a Folder Full of WebP Files on Windows
For bulk conversion on Windows without installing extra software, pixconv.io handles it in the browser:
- Open File Explorer and navigate to the folder with WebP files.
- Press Ctrl+A to select all, then drag the selected files into the pixconv.io/webp-to-png-bulk drop zone.
- Wait for all files to convert.
- Click Download all as ZIP.
For Windows users who prefer a command-line approach, ffmpeg (free, open-source) handles bulk conversion efficiently:
for %i in (*.webp) do ffmpeg -i "%i" "%~ni.png"Run this in Command Prompt from the folder containing your WebP files. It requires downloading ffmpeg from ffmpeg.org.
Preserving Transparent Backgrounds
If your WebP file has a transparent background (logos, icons, cutout photos), converting to PNG correctly preserves the transparency. Windows Paint, Photos, and pixconv.io all handle alpha channels correctly.
Avoid saving as JPEG if you need transparency — JPEG does not support transparent areas and will fill them with white.
Frequently Asked Questions
Will the converted PNG have lower quality than the WebP?
No. PNG is a lossless format, so no additional quality loss occurs during conversion. If the original WebP was lossy (which most web images are), the PNG captures exactly what the WebP displayed. If the WebP was lossless, the PNG is bit-for-bit identical.
Can I convert WebP to PNG without any internet?
Yes. Use Paint (Windows 10 21H2+ / Windows 11) or Photos offline. These are built-in Windows tools and do not require an internet connection.
What is the difference between WebP and PNG?
WebP is optimized for web delivery: smaller file sizes, faster loading. PNG is optimized for quality and compatibility: lossless compression, universal software support. For more details, see WebP vs PNG: Which Format Should You Use?.