WebP images are everywhere online — Google Images, websites, and apps all serve them. But when you download a WebP and need a PNG, it is not always obvious how to convert it. This guide covers five free methods, from the fastest online option to command-line tools for developers.
Method 1: Use pixconv.io (Fastest — No Upload Required)
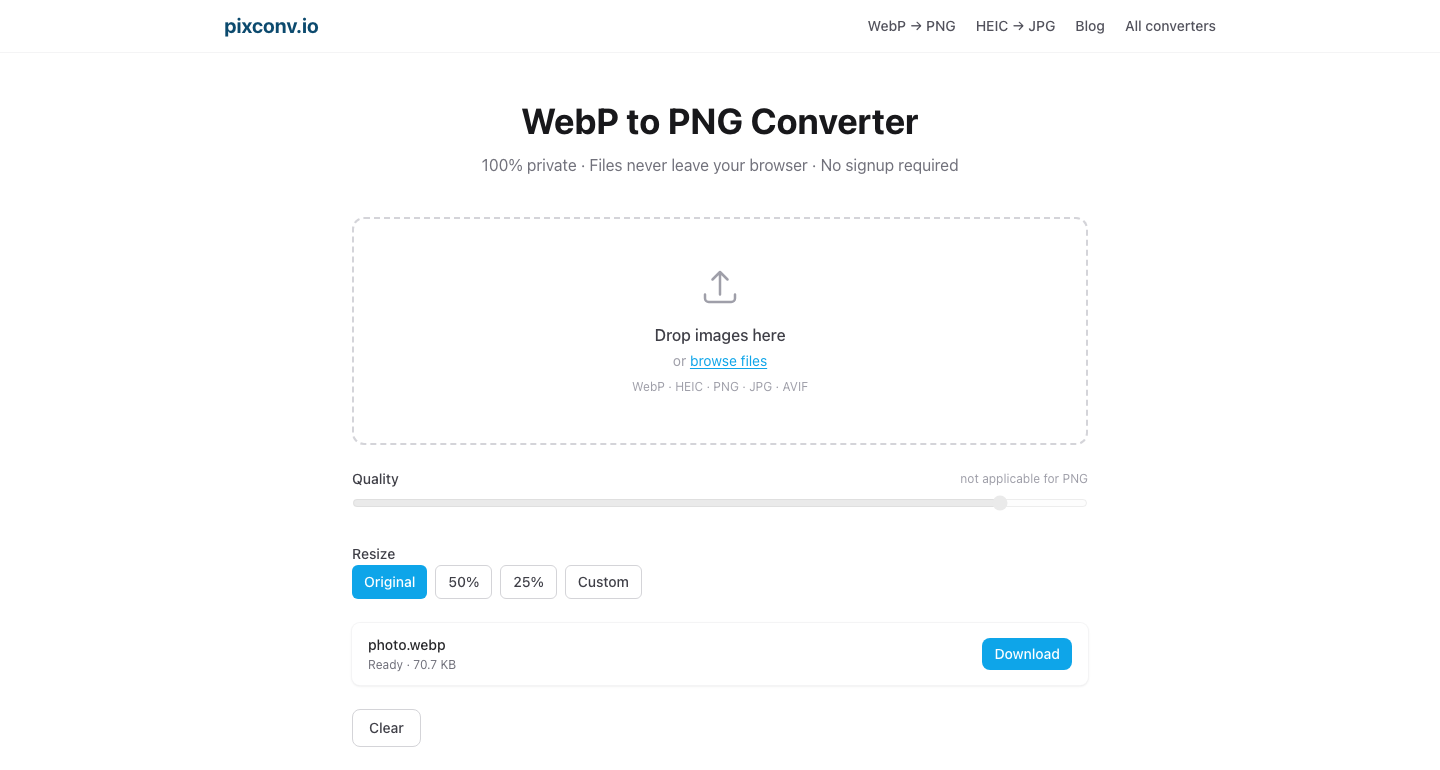
The easiest way to convert WebP to PNG is to use an online converter that runs in your browser. pixconv.io/webp-to-png processes your images locally — nothing is uploaded to a server, so your files stay private.

Steps:
- Open pixconv.io/webp-to-png in your browser.
- Drag and drop your WebP file (or files) into the drop zone, or click Browse files.
- Wait a moment — conversion typically completes in under a second.
- Click Download next to the converted PNG file.
Batch conversion: Drop multiple WebP files at once. When they are all done, a Download all as ZIP button appears so you can grab everything in one click.
Why use this method:
- No file size limits
- 100% private (files never leave your device)
- Works on Windows, Mac, Linux, iPhone, Android
- No account or signup required
Method 2: Using Preview on Mac
If you are on a Mac, the built-in Preview app can convert WebP to PNG without any additional software.
Steps:
- Open your WebP file in Preview (double-click, or right-click → Open With → Preview).
- Go to File → Export.
- In the Format dropdown, select PNG.
- Choose a save location and click Save.
Batch conversion in Preview:
- Select all your WebP files in Finder.
- Right-click → Open With → Preview. All files open as a multi-page document.
- Press ⌘A to select all thumbnails in the sidebar.
- Go to File → Export Selected Images.
- Choose a destination folder, set Format to PNG, and click Choose.
Preview exports all selected images as PNGs to the chosen folder.
Method 3: Using Paint on Windows
Windows 11’s built-in Paint app can open WebP files and save them as PNG.
Steps:
- Right-click your WebP file → Open with → Paint.
- Once open, press Ctrl+Shift+S or go to File → Save as → PNG picture.
- Choose a filename and location, then click Save.
Note: Older versions of Windows Paint may not open WebP. If Paint fails, use Method 1 (browser-based) or install the free image viewer IrfanView, which supports WebP.
Batch conversion on Windows:
Paint does not support batch conversion. For bulk converting multiple WebP files on Windows, the browser-based method (Method 1) is the most convenient option — drop all files at once and download a ZIP.
Method 4: Using GIMP (Free Desktop App)
GIMP is a free, open-source image editor available for Windows, Mac, and Linux. It has built-in WebP support.
Steps:
- Download and install GIMP from gimp.org (free).
- Open GIMP and go to File → Open, then select your WebP file.
- Go to File → Export As (not “Save” — GIMP uses “Export” for non-GIMP formats).
- In the filename field, change the extension from
.webpto.png. - Click Export. In the PNG export options dialog, click Export again.
Batch conversion with GIMP:
GIMP has a Script-Fu console that can process multiple files. For most users, the browser-based method is more practical for batch work.
When to use GIMP:
- You need to edit the image as well as convert it
- You want to adjust color profiles or settings
- You need fine control over PNG compression level
Method 5: Command Line with cwebp / ImageMagick
For developers comfortable with the terminal, there are two command-line options.
Using libwebp’s dwebp
Google’s libwebp package includes dwebp, a command-line tool that decodes WebP to other formats.
Install on Mac (via Homebrew):
brew install webpInstall on Ubuntu/Debian:
sudo apt install webpConvert a single file:
dwebp input.webp -o output.pngConvert all WebP files in a directory:
for f in *.webp; do dwebp "$f" -o "${f%.webp}.png"; doneUsing ImageMagick
ImageMagick is a powerful image processing toolkit.
Install on Mac:
brew install imagemagickConvert a single file:
convert input.webp output.pngBatch convert a directory:
mogrify -format png *.webpNote: mogrify with -format png creates .png files alongside the originals without deleting the WebP files.
Which Method Should You Use?
| Situation | Best Method |
|---|---|
| One or a few files, any platform | Method 1 (pixconv.io) |
| Batch files on Mac | Method 2 (Preview) |
| Batch files on Windows | Method 1 (pixconv.io) |
| Need to edit while converting | Method 4 (GIMP) |
| Developer automating a workflow | Method 5 (CLI) |
| Sensitive or private files | Method 1 (pixconv.io) — local processing |
Why WebP to PNG?
PNG is a lossless format that works everywhere — every operating system, photo editor, and platform accepts PNG without issue. WebP, while excellent for web delivery, is not universally supported outside of browsers.
Common reasons to convert WebP to PNG:
- Opening in software that doesn’t support WebP
- Preserving transparency (PNG keeps it; JPEG discards it)
- Archiving images in a universally compatible format
- Preparing images for print workflows
- Sharing with colleagues or clients who use older software
Frequently Asked Questions
Does converting WebP to PNG reduce quality?
No. PNG is a lossless format, so there is no quality loss during the PNG export step. If the original WebP was lossless, the PNG is pixel-perfect. If the WebP was lossy-compressed, the PNG captures exactly what the WebP displays — no further degradation occurs.
How do I convert a WebP to PNG on an iPhone?
Open pixconv.io/webp-to-png in Safari on your iPhone. Tap the drop zone to select files from your Photos library or Files app, then tap Download to save the PNG to your device.
Can I convert WebP to PNG in bulk?
Yes. The browser method (Method 1) supports batch conversion — drop multiple WebP files and download them all as a ZIP. Preview on Mac (Method 2) also supports batch export.
Why is my converted PNG larger than the original WebP?
WebP uses more efficient compression than PNG lossless. A lossy WebP is often dramatically smaller than the equivalent lossless PNG. This is expected — you are trading file size for universal compatibility and lossless storage.
Is there a file size limit?
For the browser-based converter (Method 1), the practical limit is your device’s available memory. There is no fixed cap — most users can convert images up to several hundred megabytes without issue.