Converting WebP images to PNG one at a time gets tedious fast. If you have downloaded a set of images, exported from a tool, or need to process a whole folder, batch conversion saves you significant time. Here are the best ways to convert multiple WebP files to PNG at once.
Method 1: pixconv.io — Drop a Whole Folder at Once
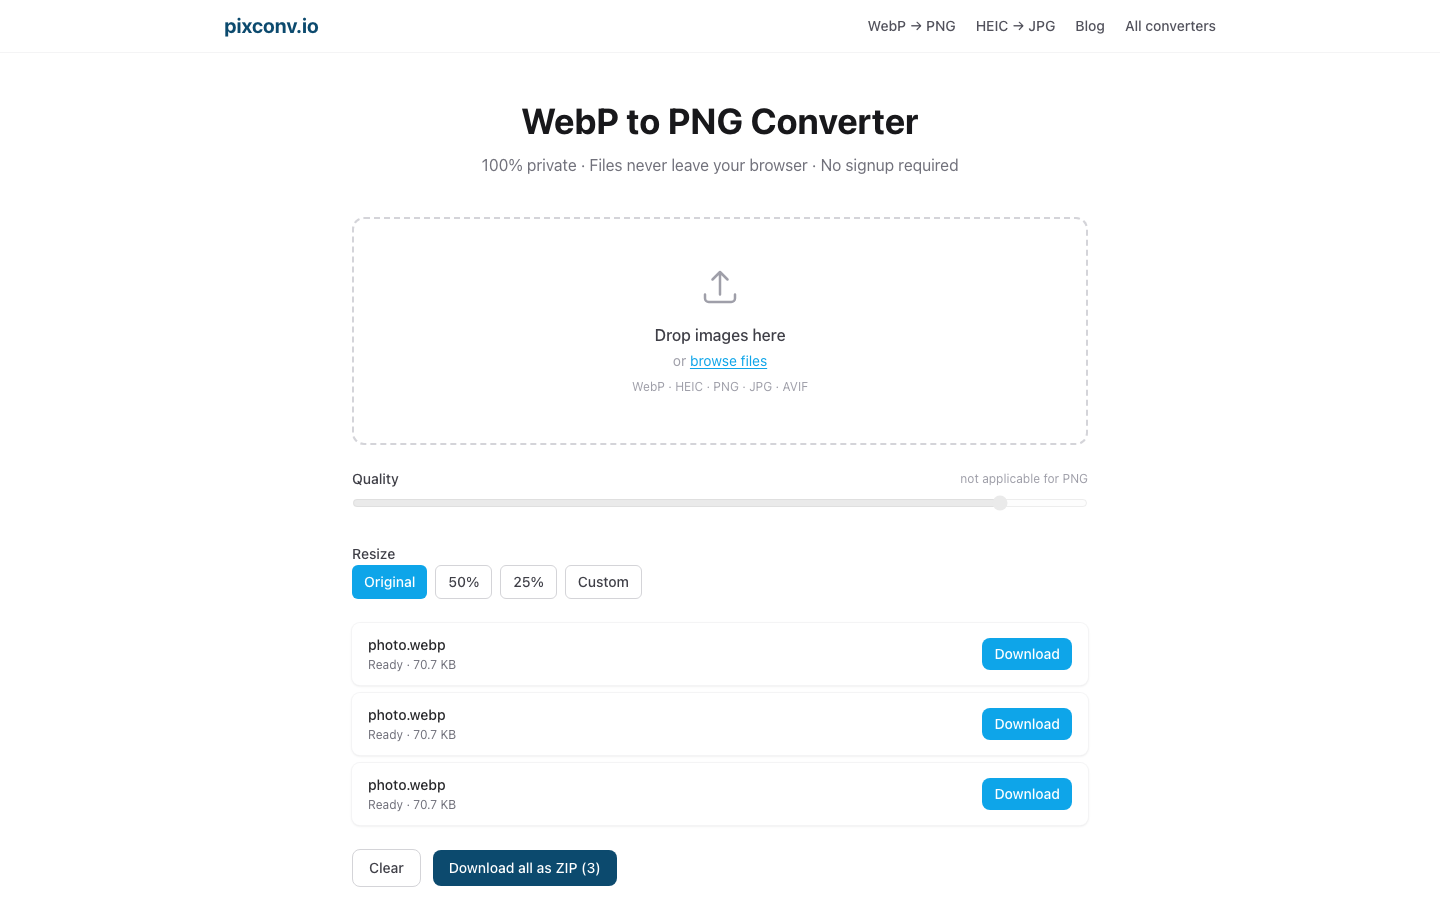
The pixconv.io WebP to PNG converter supports batch conversion out of the box, with no upload required. Your files never leave your device.
Steps:
- Open pixconv.io/webp-to-png in your browser.
- Select all the WebP files you want to convert:
- Drag and drop: Open your file manager alongside the browser window, select all WebP files (Ctrl+A or ⌘A), and drag them onto the drop zone.
- Browse: Click “Browse files,” navigate to your folder, and select multiple files with Ctrl+Click or Shift+Click.
- Watch the progress as each file is converted in turn.
- Once at least two files show “Ready,” a Download all as ZIP button appears.
- Click it to get all converted PNGs in a single archive.
How many files can I convert at once? There is no fixed limit — the constraint is your device’s available memory. Most users can process hundreds of small-to-medium images in a single session without issue. For very large batches (thousands of files), use the CLI method below.
Method 2: Mac Preview — Batch Export Selected Images
Mac’s built-in Preview app can export multiple images at once without any third-party software.
Steps:
- Open Finder and navigate to your folder of WebP files.
- Select all the WebP files you want to convert (⌘A for all, or hold ⌘ and click individual files).
- Right-click → Open With → Preview. All files open as a multi-image document.
- In Preview, press ⌘A to select all thumbnails in the sidebar.
- Go to File → Export Selected Images…
- Choose a destination folder.
- In the “Format” dropdown, select PNG.
- Click Choose.
Preview saves all selected images as PNGs to the chosen folder. The original WebP files are not deleted.
Tip: If you do not see the sidebar with thumbnails, go to View → Thumbnails.
Method 3: ImageMagick (Command Line — Best for Large Batches)
ImageMagick is a free, open-source command-line tool available for Windows, Mac, and Linux. It is the best option for processing hundreds or thousands of files, or for automating conversion as part of a build pipeline.
Install ImageMagick:
Mac (via Homebrew):
brew install imagemagickUbuntu / Debian:
sudo apt install imagemagickWindows: Download the installer from imagemagick.org.
Convert all WebP files in the current directory to PNG:
mogrify -format png *.webpThis creates a .png file for each .webp file in the current directory. The original WebP files are left in place.
Convert and save to a different output folder:
mkdir png-output
mogrify -format png -path ./png-output *.webp
Recursively convert all WebP files in subdirectories:
find . -name "*.webp" -exec sh -c 'mogrify -format png "$1"' _ {} \;Why ImageMagick for large batches?
- Handles thousands of files without memory issues
- Can be scripted and automated
- Preserves metadata (with the right flags)
- Cross-platform
Method 4: Google Chrome “Save as PNG” (For Individual Downloads)
When you right-click a WebP image in Chrome and choose Save image as, Chrome’s file picker defaults to saving as WebP. But you can type .png at the end of the filename in the save dialog on some systems. This only works for one image at a time and is not practical for batch work.
Method 5: Windows PowerShell with .NET
On Windows, a PowerShell script can batch convert using the built-in .NET System.Drawing library (available on Windows 10/11):
Add-Type -AssemblyName System.Drawing
Get-ChildItem -Filter "*.webp" | ForEach-Object {
    $img = [System.Drawing.Image]::FromFile($_.FullName)
    $outPath = [System.IO.Path]::ChangeExtension($_.FullName, ".png")
    $img.Save($outPath, [System.Drawing.Imaging.ImageFormat]::Png)
    $img.Dispose()
    Write-Host "Converted: $($_.Name)"
}
Save this as convert.ps1, navigate to your folder in PowerShell, and run .\convert.ps1.
Note: If you get an execution policy error, run Set-ExecutionPolicy -Scope Process Bypass first.
Which Method Is Right for You?
| Situation | Best Method |
|---|---|
| Any platform, up to ~500 files | Method 1 (pixconv.io — browser) |
| Mac, medium batches | Method 2 (Preview) |
| Large batches, automation | Method 3 (ImageMagick) |
| Windows, no installs | Method 1 (pixconv.io — browser) |
| Windows power user | Method 5 (PowerShell) |
Frequently Asked Questions
How many WebP files can I convert at once in the browser?
There is no fixed limit. The constraint is your device’s available memory. Most devices can handle hundreds of files without issue. For thousands of files, ImageMagick is more reliable.
Will batch converting preserve transparency?
Yes. Transparent WebP images are converted to transparent PNG by all methods above.
Does batch conversion reduce image quality?
PNG is a lossless format — there is no quality loss in the conversion step. The PNG captures exactly what each WebP displays.
Is there a way to maintain the original folder structure?
ImageMagick (Method 3) with find and proper path manipulation can preserve folder structure. The browser-based method and Preview place all files flat in a single folder or ZIP.